

I have tried several ways to do the mod to the SN door panels with some luck but also muxh work. I have now found a way to do it in about an hour with basic tools. I am going to put together a step by step of that process. Be advised that my numbers may not match yours as this will very with the way your dash was installed. Some adjustments will have to be made so take your time and if your unsure, get a set of junk panels for paratice. Good luck and if you have any questions feel free to ask.

This is what we all have to start with, the problem is that the panel is taller in the back than in the front. This is what we will have to fix.
Start by removing the staples from the back of the panel. This can be skipped if you plan to have the panel recovered.
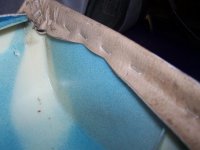
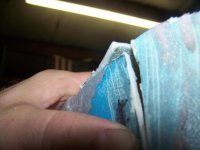
This is a shot of the panel with the skin pulled back. This is a chep way to do the panel as it can be streched back over the face later.

In this shot I have mesured from the back of the panel to the point where my cut will end. In this method you will not seperate the top half of the panel from the bottom. You will be left with a hinge to fold the top down. It will be seen soon. Remeber that my mesurements will not be the same as yours but should be close. This one will likly not change.
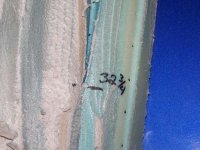
This is the back end of the cut, or the higth of the new panel. This is the one that I would think would be different.
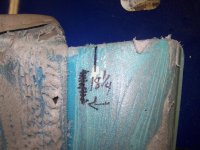
Connect the lines to get the cut line.

The second line follows the contour of the top edge of the panel. This is the area where it rolls down.


The lines will intersect at the front of the panel near the slot for the door cups tab. This is where the cut will end.

This is what I have found to cut with. I have tried it all. But thsi seems to work the best. They can be found at any hardware store.


Take your time to make the cuts. You have to be carful and don't let your tool get away form you. The bits of plastic that fly at you will be very hot so where glasses and a long shirt. You should end up with something like this.

The top piece can them be foled down to look like this.

Now you will have to take a heat gun and warm up the area marked and relax the plastic.


Now this is what you should have!!

With the top pulled down there is small piece that will need to be cut off. This is the back of the top end of the panel.

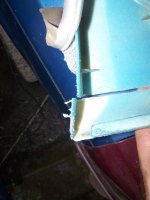


After some trimming of the piece that was cut out it can be gled back in later in the process.


Now you will need to remove a small rib from the inside of the panel. It is marked in this shot with the black arrow.


You then have to cut the corner of the panel and heat the area to pull it in. This has to be done to keep the panel lined up after gluing it back together.

This picture shows a small tab that has to be cut off after the panel has been reshaped.

You will need to trim the front of the panel to get it to fit between the dash and the door.

Next you can tape the panel up with a good high end duck tape. This is when the piece that you trimed up early on is put back.


With this done you can now use a good high end plastic body filler. It will hold the panel together quite well.


Rember that bondo gets hot and shinks. It may take time to get it built up.
If you have taken your time and are carful this is what you should have.


Be sure to make sure that the panel lines up with the dash, attiton to detal.

This is what we all have to start with, the problem is that the panel is taller in the back than in the front. This is what we will have to fix.
Start by removing the staples from the back of the panel. This can be skipped if you plan to have the panel recovered.
This is a shot of the panel with the skin pulled back. This is a chep way to do the panel as it can be streched back over the face later.
In this shot I have mesured from the back of the panel to the point where my cut will end. In this method you will not seperate the top half of the panel from the bottom. You will be left with a hinge to fold the top down. It will be seen soon. Remeber that my mesurements will not be the same as yours but should be close. This one will likly not change.
This is the back end of the cut, or the higth of the new panel. This is the one that I would think would be different.
Connect the lines to get the cut line.
The second line follows the contour of the top edge of the panel. This is the area where it rolls down.
The lines will intersect at the front of the panel near the slot for the door cups tab. This is where the cut will end.
This is what I have found to cut with. I have tried it all. But thsi seems to work the best. They can be found at any hardware store.
Take your time to make the cuts. You have to be carful and don't let your tool get away form you. The bits of plastic that fly at you will be very hot so where glasses and a long shirt. You should end up with something like this.
The top piece can them be foled down to look like this.
Now you will have to take a heat gun and warm up the area marked and relax the plastic.
Now this is what you should have!!
With the top pulled down there is small piece that will need to be cut off. This is the back of the top end of the panel.
After some trimming of the piece that was cut out it can be gled back in later in the process.
Now you will need to remove a small rib from the inside of the panel. It is marked in this shot with the black arrow.
You then have to cut the corner of the panel and heat the area to pull it in. This has to be done to keep the panel lined up after gluing it back together.
This picture shows a small tab that has to be cut off after the panel has been reshaped.
You will need to trim the front of the panel to get it to fit between the dash and the door.
Next you can tape the panel up with a good high end duck tape. This is when the piece that you trimed up early on is put back.
With this done you can now use a good high end plastic body filler. It will hold the panel together quite well.
Rember that bondo gets hot and shinks. It may take time to get it built up.
If you have taken your time and are carful this is what you should have.
Be sure to make sure that the panel lines up with the dash, attiton to detal.


